9.10 Leak detection and repair
A refrigerant leak lowers charge, cuts capacity and can let air and moisture in. Many refrigerants are greenhouse gases, and some, like R32 and R290, are flammable to different degrees. So leaks matter for performance, safety and environment.
Common leak points are brazed joints, flare nuts, Schrader valve cores, service valve stems, capillary tubes rubbing on the frame, and vibration cracks. Brazing leaks are often caused by poor joint clearance, overheating or not using nitrogen purge.
Leak detection methods
| Method | How it works | Good for | Limit |
|---|---|---|---|
| Visual / oil stain | Refrigerant carries oil out; joint looks wet or dusty | First quick check | Small leaks may not show |
| Soap bubbles | Bubbles form at leak | Pinpointing on accessible joints | Slow; needs pressure in system |
| Electronic detector | Sensor senses refrigerant | Searching wide areas | Wind and other gases confuse it |
| UV dye | Dye glows under UV light | Intermittent leaks | Dye must be compatible with oil |
| Nitrogen pressure test | Fill with dry nitrogen, watch pressure | Proving tightness after repair | Allow for temperature change |
| Nitrogen + tracer (95/5 nitrogen-hydrogen) | Detector finds hydrogen | Very small leaks | Needs suitable detector |
| Vacuum hold (decay) test | Pressure rise while under vacuum | Proves tight and dry | Moisture also causes rise |
Repair procedure
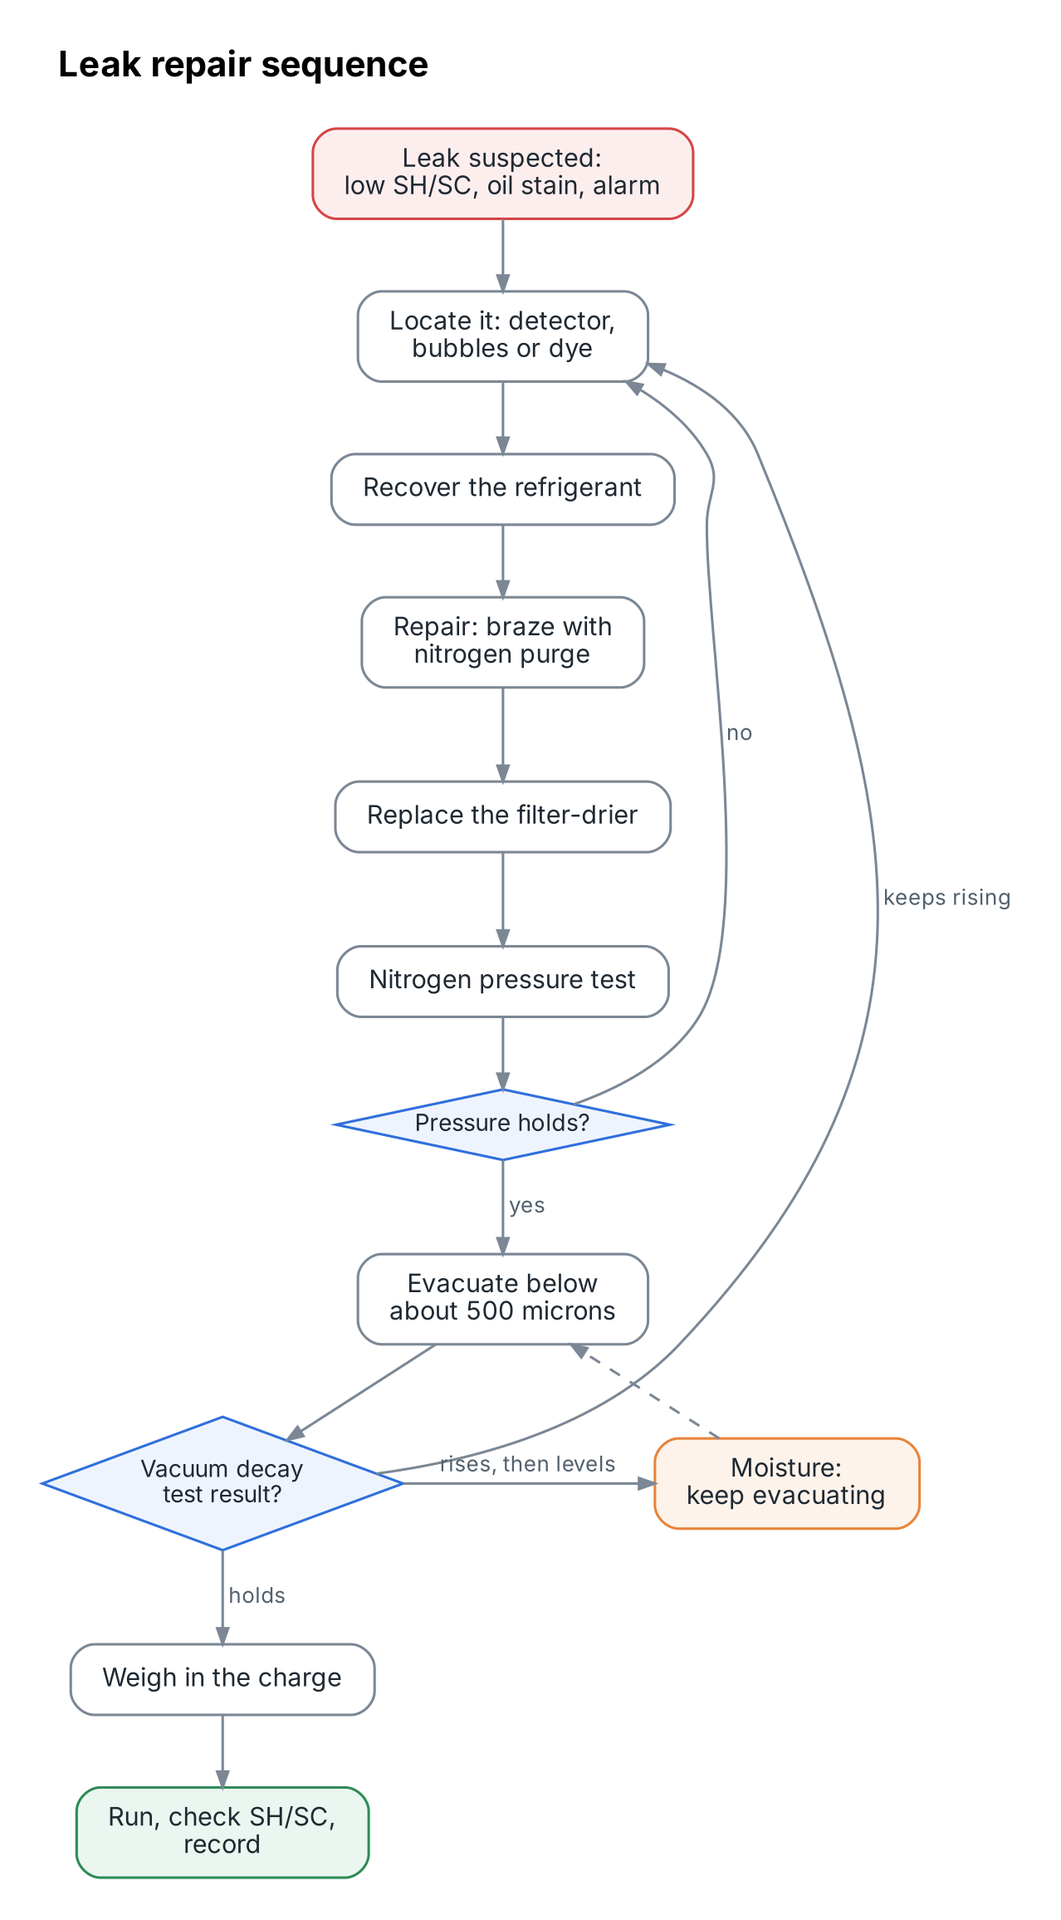
- Recover refrigerant into a recovery cylinder. Never vent it.
- Make the repair. Braze with dry nitrogen flowing through the pipe to stop oxide scale forming inside.
- Replace the filter-drier whenever the system is opened.
- Pressure test with dry nitrogen to the test pressure in the manual. Hold and watch for drop (correct for temperature).
- Release nitrogen and evacuate to a deep vacuum. A common target is below 500 microns (about 0.67 mbar absolute).
- Isolate the pump and do a decay test. If pressure keeps rising, there is a leak; if it rises then levels off, there is still moisture.
- Weigh in the charge by weight from the nameplate, as liquid where the refrigerant is a blend.
- Run, check SH and SC, leak test again, record.
Worked example — Correcting a nitrogen test for temperature
Nitrogen test pressure set at 30 bar(g) at 25 °C in the morning in Kolkata. In the afternoon the reading is 30.8 bar(g) at 32 °C. Is it holding?
Use absolute pressure and absolute temperature (gas law, constant volume).
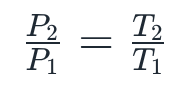
P₁ = 30 + 1.013 = 31.0 bar abs; T₁ = 25 + 273 = 298 K; T₂ = 32 + 273 = 305 K. P₂ expected = 31.0 × 305 ÷ 298 = 31.7 bar abs = 30.7 bar(g).
Reading 30.8 bar(g) ≈ expected 30.7 bar(g). The rise is only from heat; the system is holding.
Remember
- Recover, never vent.
- Braze with nitrogen flowing; change the drier.
- Prove tightness with nitrogen, then dryness with vacuum.
- Charge by weight.
Find the leak, fix it properly, then prove the system is tight and dry before charging.
There are no comments for now.
to be the first to leave a comment.